Install ORACLE 10g on RHEL4
● Engine 생성전
- oracle 계정생성
[root@server114 root]# groupadd –g 5000 dba [root@server114 root]# useradd –g dba oracle [root@server114 root]# passwd oracle |
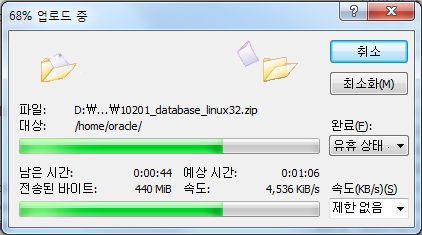
- winscp 이용해 필요한 설치파일 전송 (window: oracle 10g 설치파일---> linux: /home/oracle 로 전송)
patch patchset /hom/oracle 10201_database_linux32.zip
|
- /etc/sysctl.conf 커널설정하기 (대소문자구분, 공백주의)
[root@server114 root]# vi /etc/sysctl.conf // 기존 내용에 아래의 내용 추가. // 푸티에서 작성시 오른쪽 하단의 글자가 깨져있으면 유니코드전환 후 작성해야함. kernel.shmmax=536870912 kernel.sem=250 32000 100 128 fs.file-max=65536 |
- /etc/security/limits.conf 커널설정하기
[root@server114 root]# vi /etc/security/limits.conf //기존 내용에 아래의 내용 추가. oracle10g soft nproc 2047 |
- /etc/pam.d/login 커널설정하기
[root@server114 root]# vi /etc/pam.d/login //기존 내용에 아래의 내용 추가. session required pam_limits.so |
- RPM설치 ( 설치 CD 3번 연결 후 )
[root@server114 root]# umount /media/cdrecoder [root@server114 root]# mount /media/cdrecoder // CD새로 인식 [root@server114 root]# cd /media/cdrecoder/RedHat/RPMS [root@server114 RPMS]# rpm -ivh libaio-devel-0.3.105-2.i386.rpm 경고: libaio-devel-0.3.105-2.i386.rpm: V3 DSA signature: NOKEY, key ID db42a60e 준비 중... ########################################### [100%] 1:libaio-devel ########################################### [100%] [root@server114 RPMS]# cd /home/oracle/patch/ [root@server114 patch]# unzip p4198954_40_LINUX.zip Archive: p4198954_40_LINUX.zip inflating: compat-libcwait-2.1-1.i386.rpm inflating: compat-oracle-rhel4-1.0-5.i386.rpm inflating: README.txt [root@server114 patch]# rpm -ivh compat-libcwait-2.1-1.i386.rpm 준비 중... ########################################### [100%] 1:compat-libcwait ########################################### [100%] [root@server114 patch]# rpm -ivh compat-oracle-rhel4-1.0-5.i386.rpm 준비 중... ########################################### [100%] 1:compat-oracle-rhel4 ###################################### [100%] |
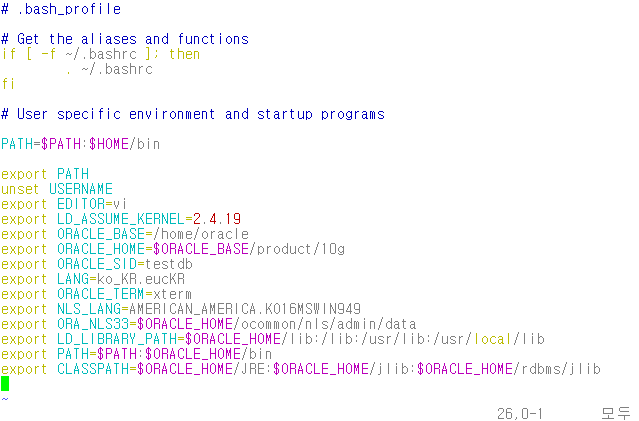
- .bash_profile 환경설정 (oracle 계정)
[root@server114 patch]# su - oracle [oracle@server114 ~]$ vi .bash_profile // 기존 내용에 아래내용 추가 export EDITOR=vi export LD_ASSUME_KERNEL=2.4.19 export ORACLE_BASE=/home/oracle
|
- oracle10g 파일 압축풀기 (root로 작업)
[oracle@server114 ~]$ su - [root@server114 root]# cd /home/oracle [root@server114 oracle]# unzip 10201_database_linux32.zip [root@server114 oracle]# chown -R oracle.dba /home/oracle |
- oraInst.loc 파일생성 (log파일 저장위치를 지정)
[root@server114 oracle]# vi /etc/oraInst.loc inventory_loc=/home/oracle/oraInventory inst_group=dba [root@server114 oracle]# chown -R oracle.dba /etc/oraInst.loc |
- response 파일(enterprise.rsp) 내용수정
[root@server114 oracle]# vi /home/oracle/database/response/enterprise.rsp // 아래의 내용 찾아서 수정 UNIX_GROUP_NAME="dba" ORACLE_HOME="/home/oracle/product/10g" ORACLE_HOME_NAME="OUIHome" COMPONENT_LANGUAGES={"en,ko"} INSTALL_TYPE="EE" n_configurationOption="3" |
- RHEL4 로그아웃 후 오라클계정으로 로그인.

● Engine(10.2.0.1) 생성
- 엔진설치 디렉토리로 이동후 silent 옵션으로 runInstaller 실행
[oracle@server114 oracle]$ cd /home/oracle/database [oracle@server114 Disk1]$ ./runInstaller -silent -responseFile /home/oracle/database/response/enterprise.rsp |
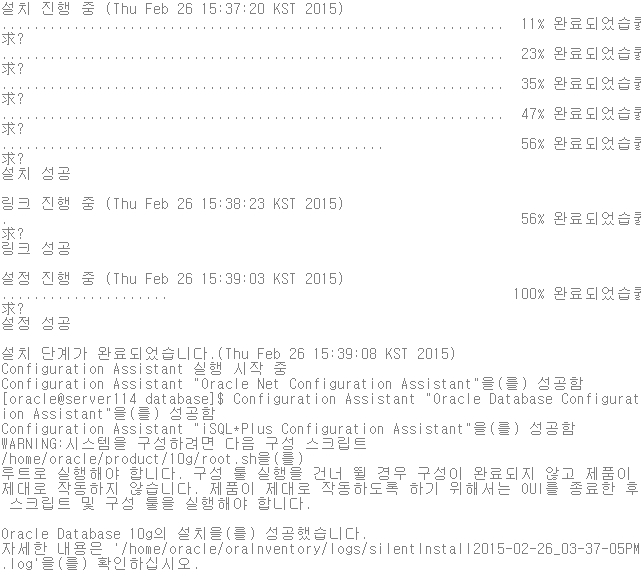
- 엔진 설치완료 후 root로 스크립트 실행
위의 화면이 뜨면 엔진설치 성공. [oracle@server114 database]$ su - Password: [root@server114 ~]# [root@server114 ~]# /home/oracle/product/10g/root.sh Running Oracle10 root.sh script... The following environment variables are set as: ORACLE_OWNER= oracle ORACLE_HOME= /home/oracle/product/10g Enter the full pathname of the local bin directory: [/usr/local/bin]: Copying dbhome to /usr/local/bin ... Copying oraenv to /usr/local/bin ... Copying coraenv to /usr/local/bin ... Entries will be added to the /etc/oratab file as needed by Database Configuration Assistant when a database is created Finished running generic part of root.sh script. Now product-specific root actions will be performed. |
- 설치 확인
[oracle@server114 database]$ sqlplus / as sysdba SQL*Plus: Release 10.2.0.1.0 - Production on Thu Feb 26 15:50:59 2015 Copyright (c) 1982, 2005, Oracle. All rights reserved. Connected to an idle instance. SQL>
|
- 패치파일 디렉토리로 이동후 압축해제
[oracle@server114 ~]$ cd /home/oracle/patchset [oracle@server114 patchset]$ unzip p6810189_10204_Linux-x86.zip |
- response 파일(patchset.rsp) 내용수정
[oracle@server114 patchset]$ cd /home/oracle/patchset/Disk1/response/ [oracle@server114 response]$ ll 합계 16 -rwxr-xr-x 1 oracle dba 15971 8월 20 2006 patchset.rsp [oracle@server114 response]$ vi patchset.rsp UNIX_GROUP_NAME="dba" FROM_LOCATION="../stage/products.xml" ORACLE_HOME="/home/oracle/product/10g" ORACLE_HOME_NAME="OUIHome" COMPONENT_LANGUAGES={"en,ko"} |
- 엔진 패치
[oracle@server114 response]$ cd /home/oracle/patchset/Disk1 [oracle@server114 Disk1]$ ./runInstaller -silent -responseFile /home/oracle/patchset/Disk1/response/patchset.rsp |
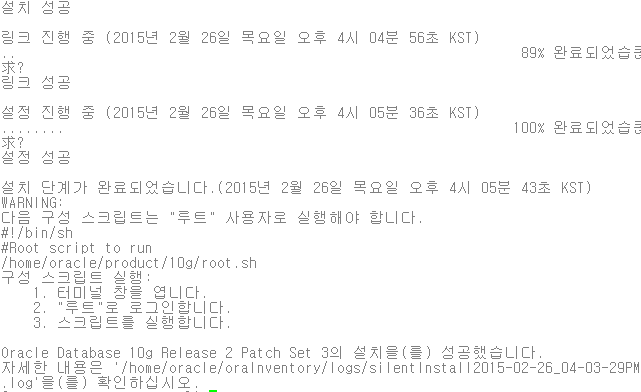
- 패치완료 (새로 putty창 열고 root로 스크립트 실행 )
login as: root root@172.16.133.129's password: Last login: Thu Feb 26 15:20:39 2015 from 172.16.133.1 [root@server114 ~]# /home/oracle/product/10g/root.sh Running Oracle10 root.sh script... The following environment variables are set as: ORACLE_OWNER= oracle ORACLE_HOME= /home/oracle/product/10g Enter the full pathname of the local bin directory: [/usr/local/bin]: The file "dbhome" already exists in /usr/local/bin. Overwrite it? (y/n) [n]: y Copying dbhome to /usr/local/bin ... The file "oraenv" already exists in /usr/local/bin. Overwrite it? (y/n) [n]: y Copying oraenv to /usr/local/bin ... The file "coraenv" already exists in /usr/local/bin. Overwrite it? (y/n) [n]: y Copying coraenv to /usr/local/bin ... Entries will be added to the /etc/oratab file as needed by Database Configuration Assistant when a database is created Finished running generic part of root.sh script. Now product-specific root actions will be performed. [root@server114 ~]# |
- 패치확인 (다시 oracle계정으로 로그인한 putty창으로 돌아와서 )
[oracle@server114 Disk1]$ sqlplus / as sysdba SQL*Plus: Release 10.2.0.4.0 - Production on Thu Feb 26 16:16:31 2015 Copyright (c) 1982, 2007, Oracle. All Rights Reserved. Connected to an idle instance. SQL>
|
● DB생성 (DBCA) : DataBase Configuration Assistant
- response 파일(dbca.rsp) 내용수정
[oracle@server114 Disk1]$ cd /home/oracle/database/response/ [oracle@server114 response]$ [oracle@server114 response]$ vi dbca.rsp GDBNAME="testdb" SID="testdb" TEMPLATENAME="/home/oracle/product/10g/assistants/dbca/templates/New_Database.dbt" CHATACTERSET="KO16MSWIN949" NATIONALCHARACTERSET="UTF8" |
- DBCA 실행
[oracle@server114 response]$cd /home/oracle/product/10g/bin [oracle@server114 bin]$ ./dbca -silent -responseFile /home/oracle/database/response/dbca.rsp
|

[oracle@server114 bin]$ sqlplus / as sysdba SQL*Plus: Release 10.2.0.4.0 - Production on Fri Feb 27 16:54:58 2015 Copyright (c) 1982, 2007, Oracle. All Rights Reserved. Connected to: Oracle Database 10g Enterprise Edition Release 10.2.0.4.0 - Production With the Partitioning, OLAP, Data Mining and Real Application Testing options SQL>
|

'Oracle > install' 카테고리의 다른 글
| [RAC] OEL5 + Oracle 11g + RAC_ASM (VMware, node1,2설정) (0) | 2016.03.18 |
|---|---|
| [Single] RHEL5 + ORACLE 11g(11.2.0.1) 설치(OUI) (0) | 2016.03.17 |
| [Single] RHEL4 + ORACLE 10g(10.2.0.1) > (10.2.0.4) 설치(OUI) (0) | 2016.03.17 |
| [Single] RHEL3 + ORACLE 9i R2 설치(Silent) (0) | 2016.03.17 |
| [Single] RHEL3 + ORACLE 9i(9.2.0.4) > (9.2.0.7) > (9.2.0.8) 설치(OUI) (0) | 2016.03.17 |